|
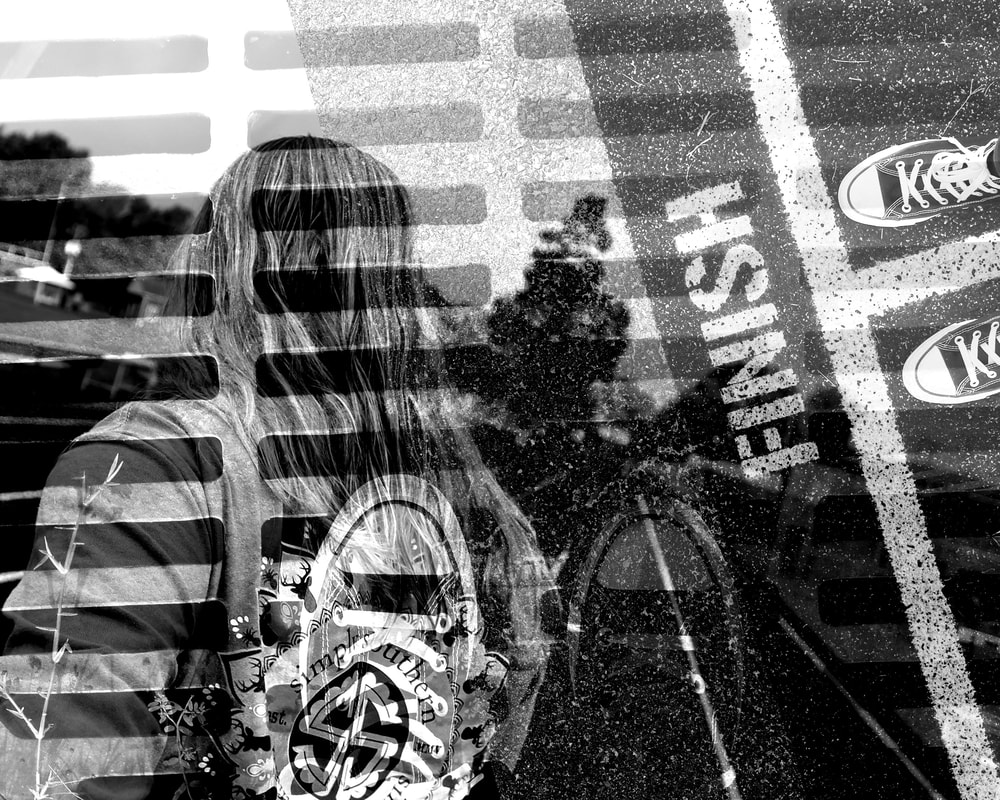
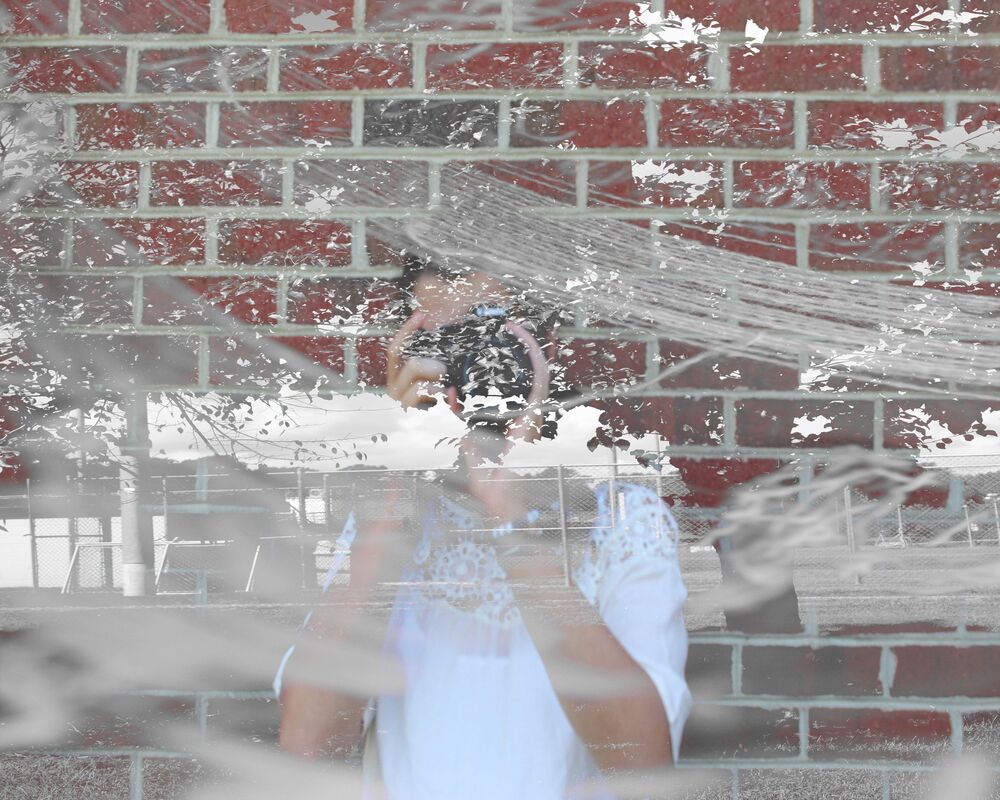
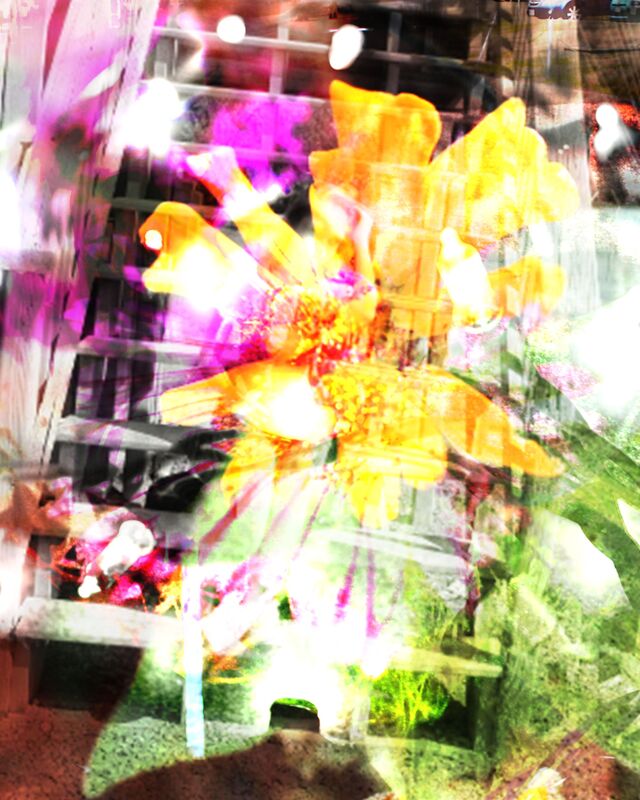
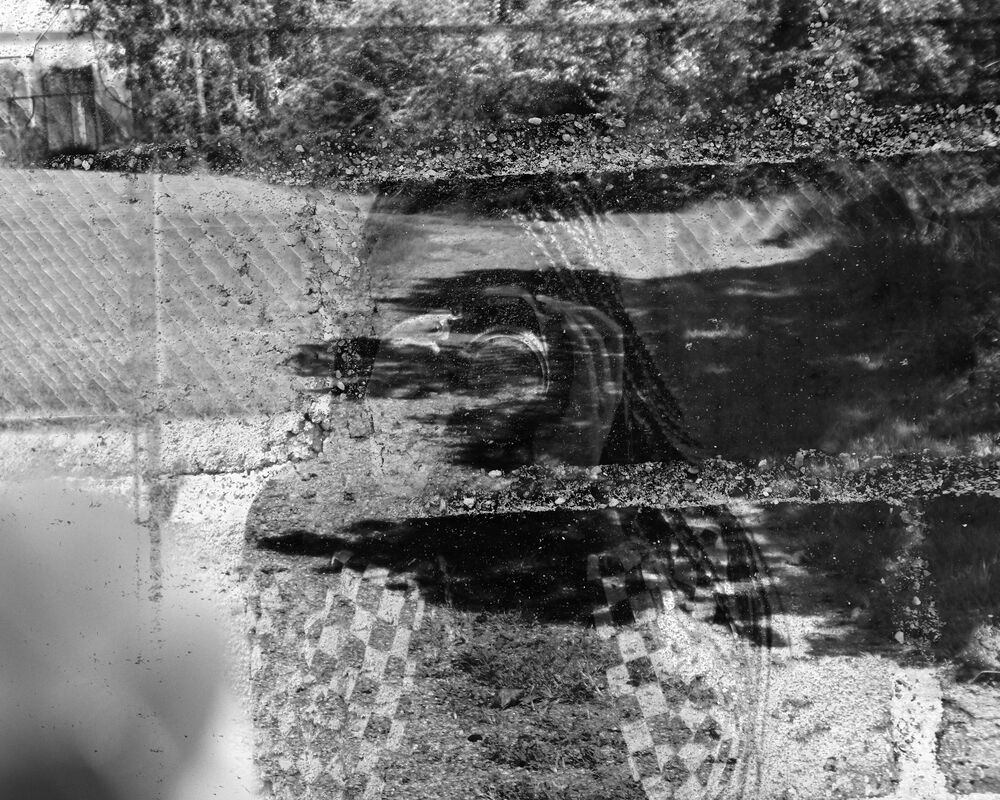
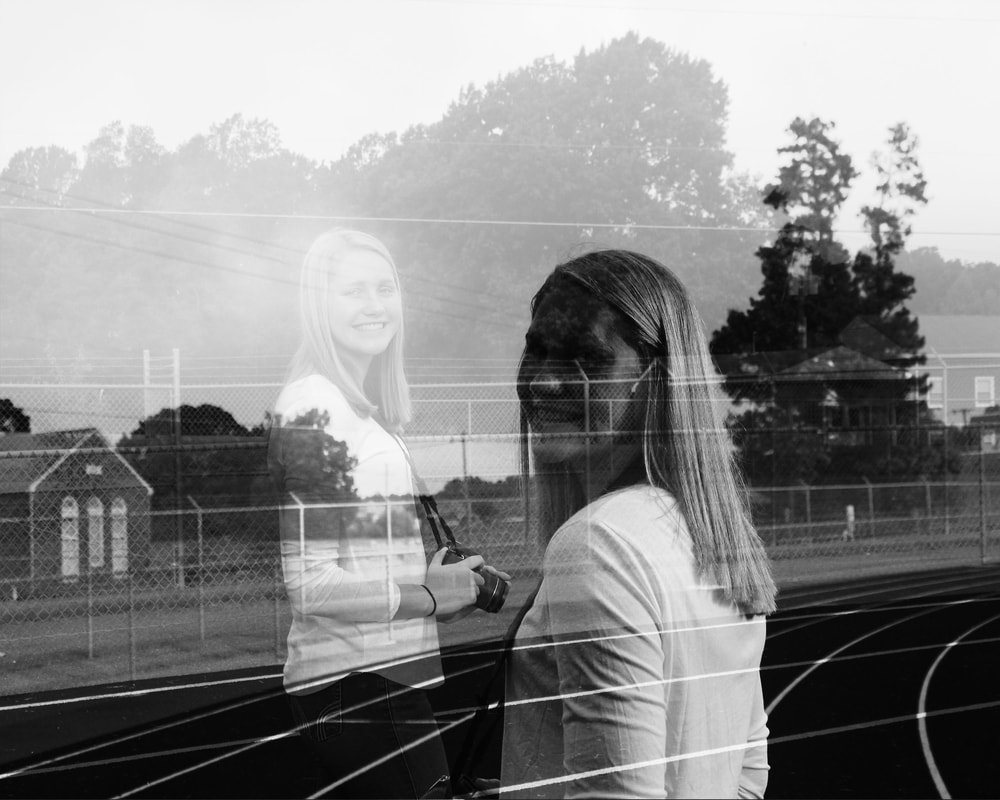
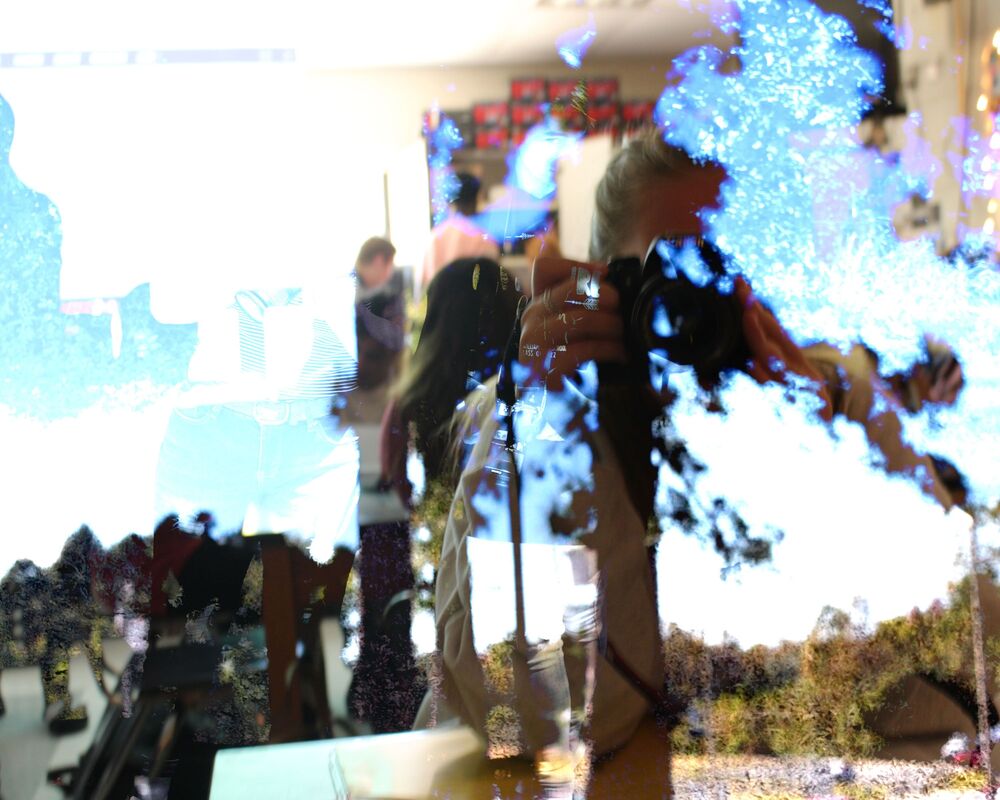
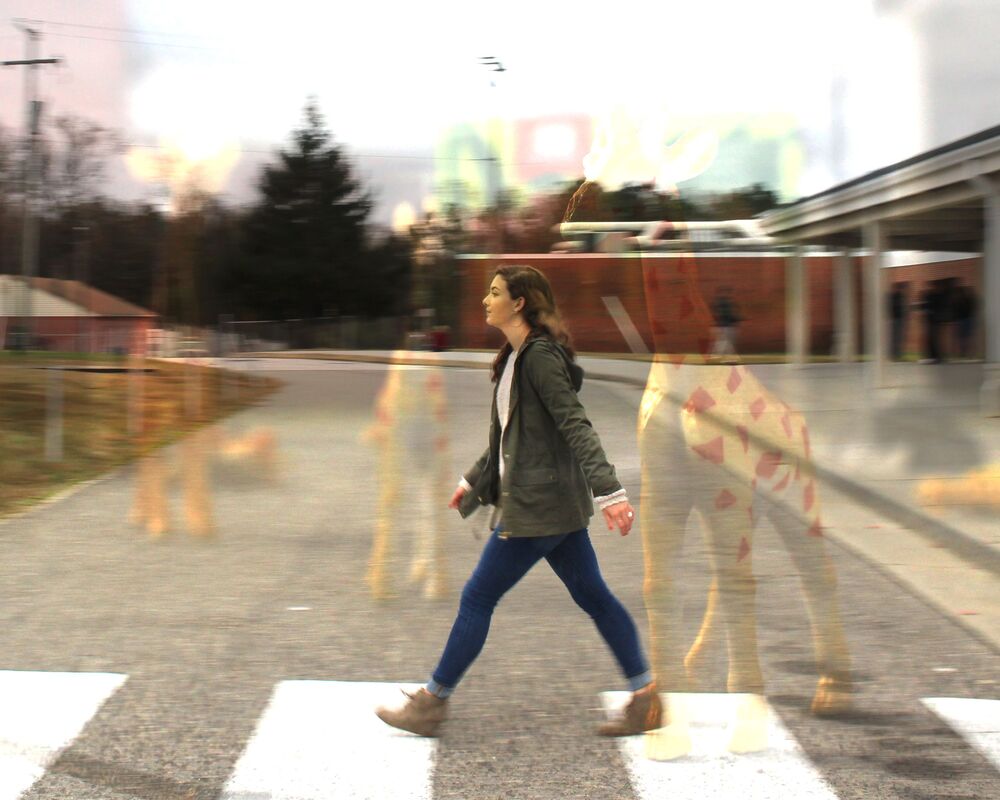
Have you ever seen images that look like one photo inside another? Photos like this are using a style called double-exposure photography. Double-exposure photography is perfect if you want to try something new while keeping your current aesthetic or if you feel like you’re stuck in a rut and want to shake things up 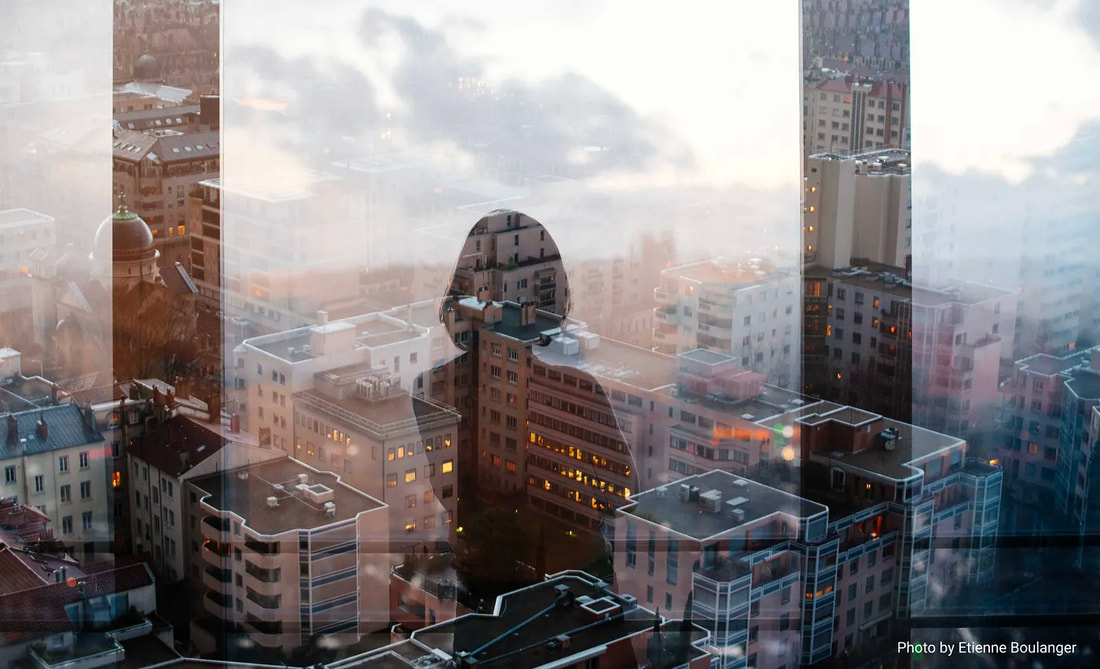 What is a double exposure? A double exposure is a combination of two images in one. One image is layered on top of another for a unique effect. 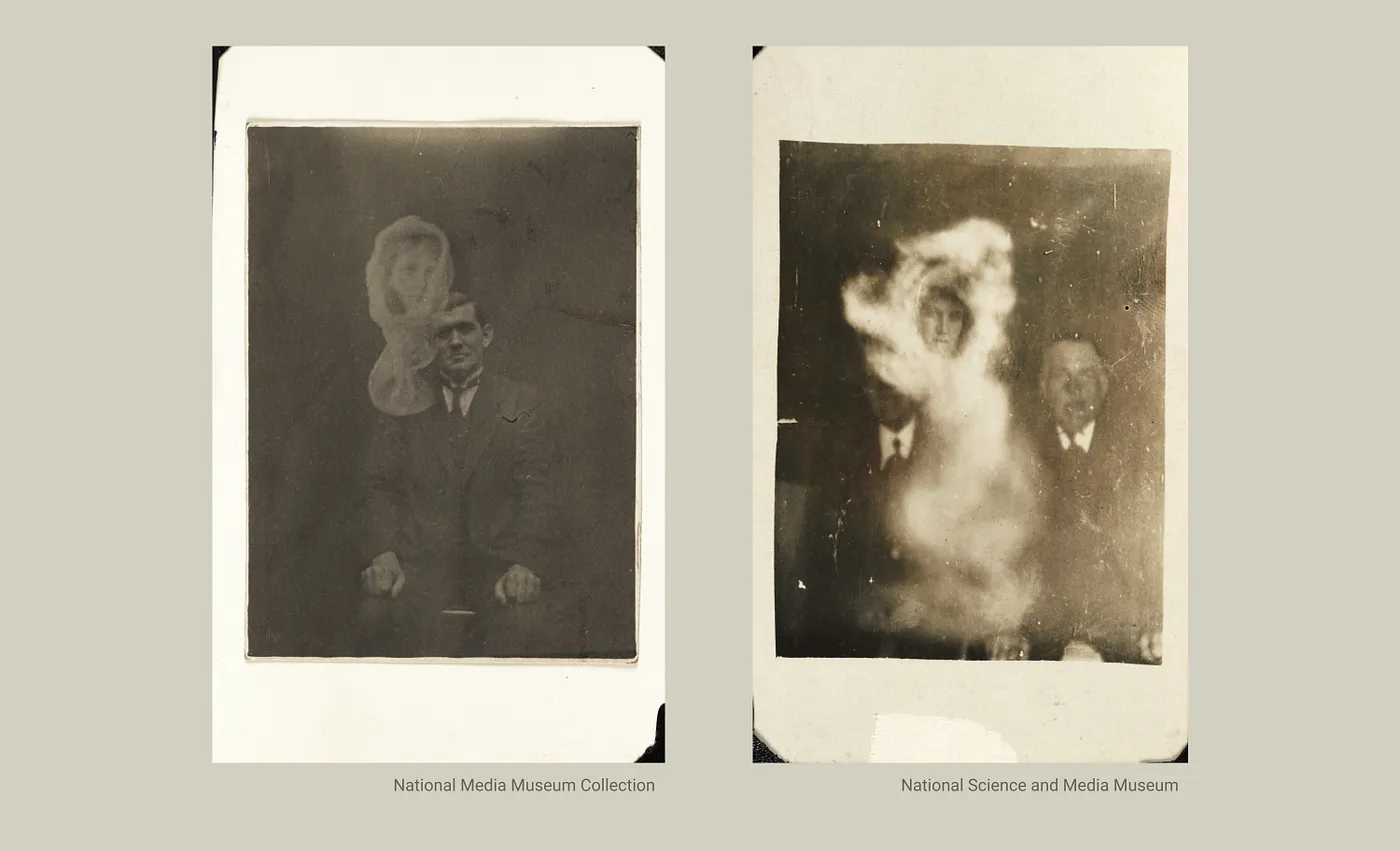 The history of double-exposure photography can be traced back to the 1860s when William H. Mumler pioneered what he referred to as spirit photography. He would use a previously exposed negative while taking a portrait, and the resulting photo would appear to have a spirit in it.  We are going to create double exposures using Photoshop's blending modes. There are step-by-step directions below to follow, or follow the directions in the YouTube tutorial (https://youtu.be/XW0WebDBy14) -- Tips for Composition:
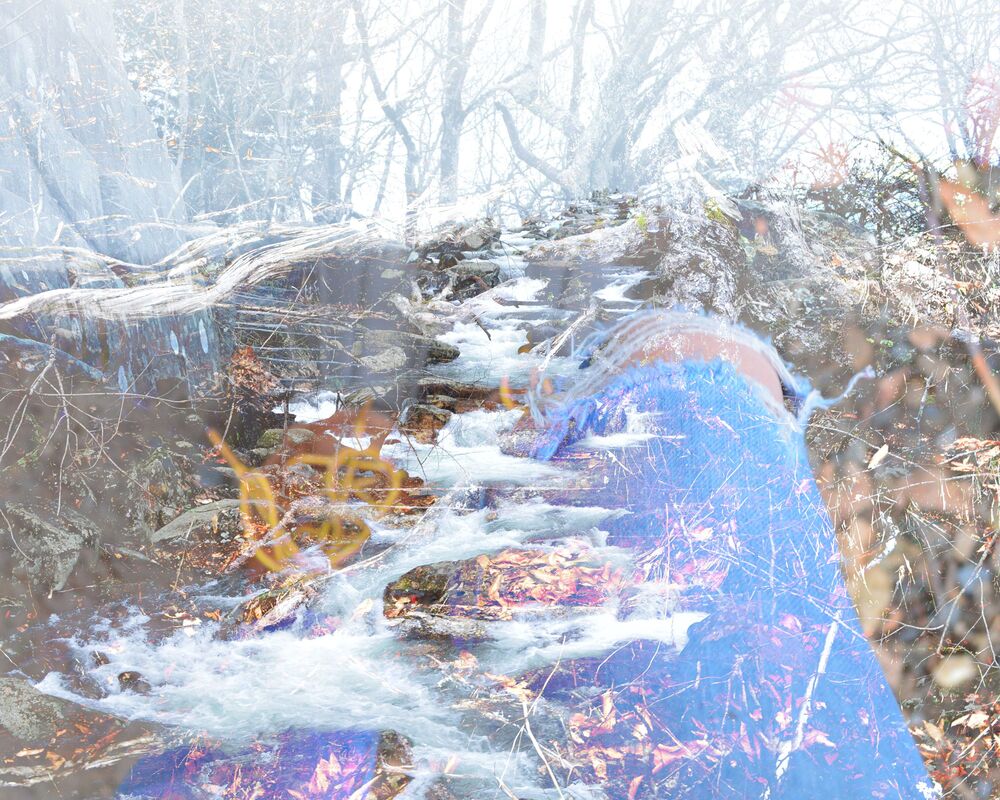
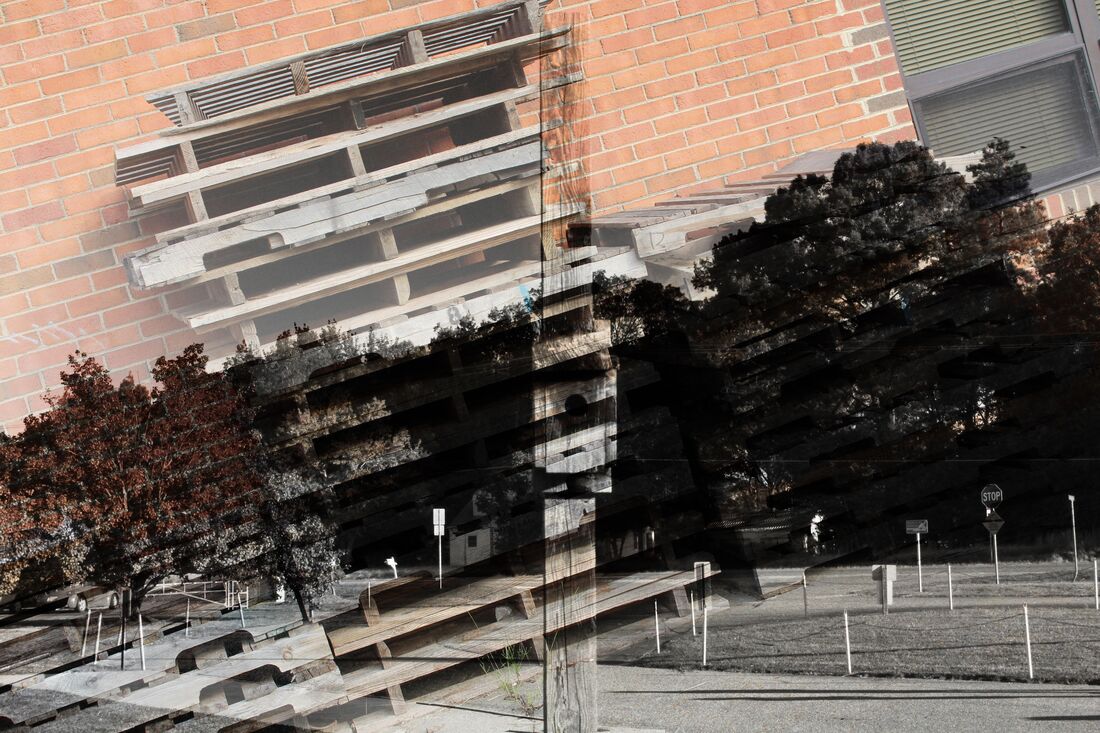
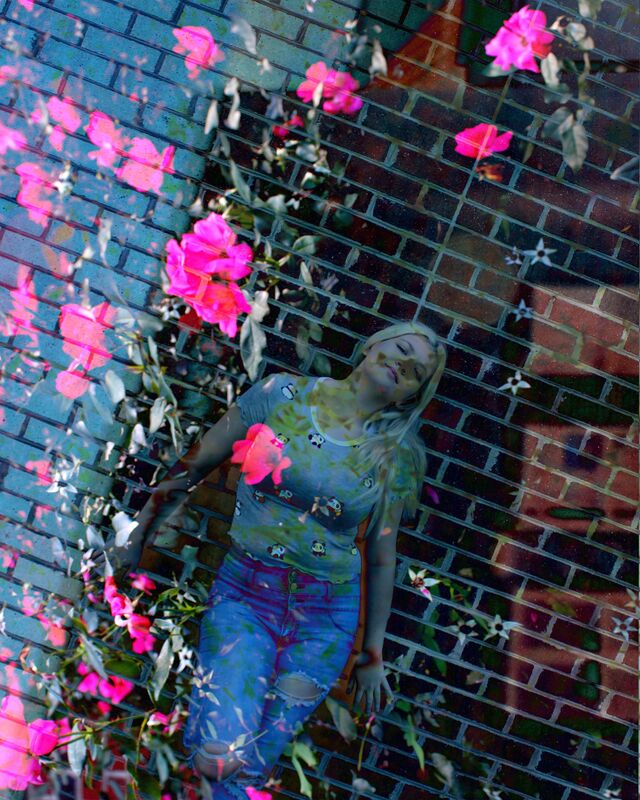
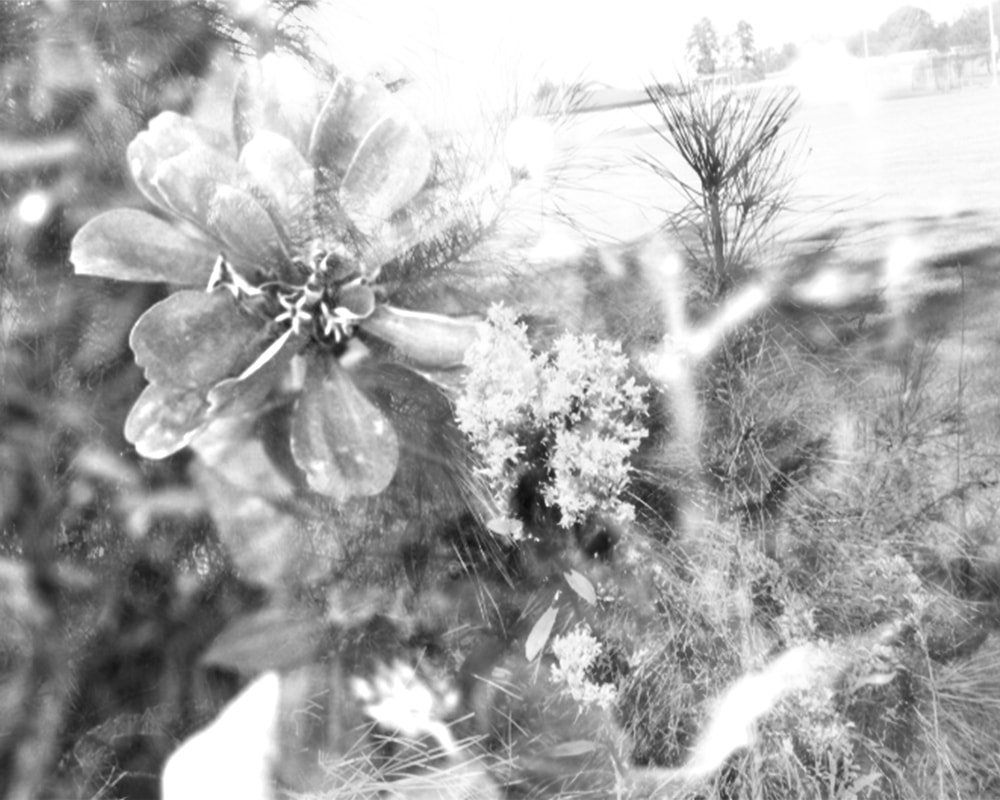
STUDENT EXAMPLES: Directions: 1 - Get your workspace ready. Go to File > New... and set up your document as outlined below: Width = 8, Height = 10 or Width = 10, Height = 10 Units of Measurement = Inches Resolution = 300 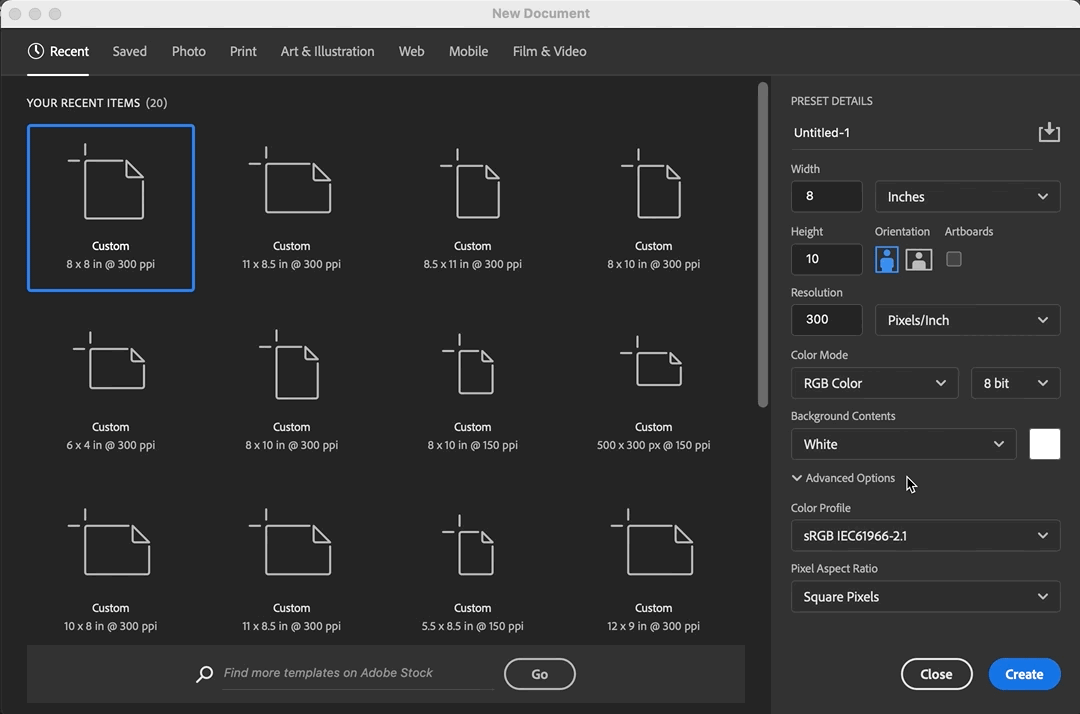 2 - Save the document - lastname-block-DoubleExposure-01.psd *SAVE OFTEN by pressing Command S as you work! This is a good habit to get into to reduce the chance of losing your progress due to program issues such as Photoshop quitting unexpectedly or other interruptions. 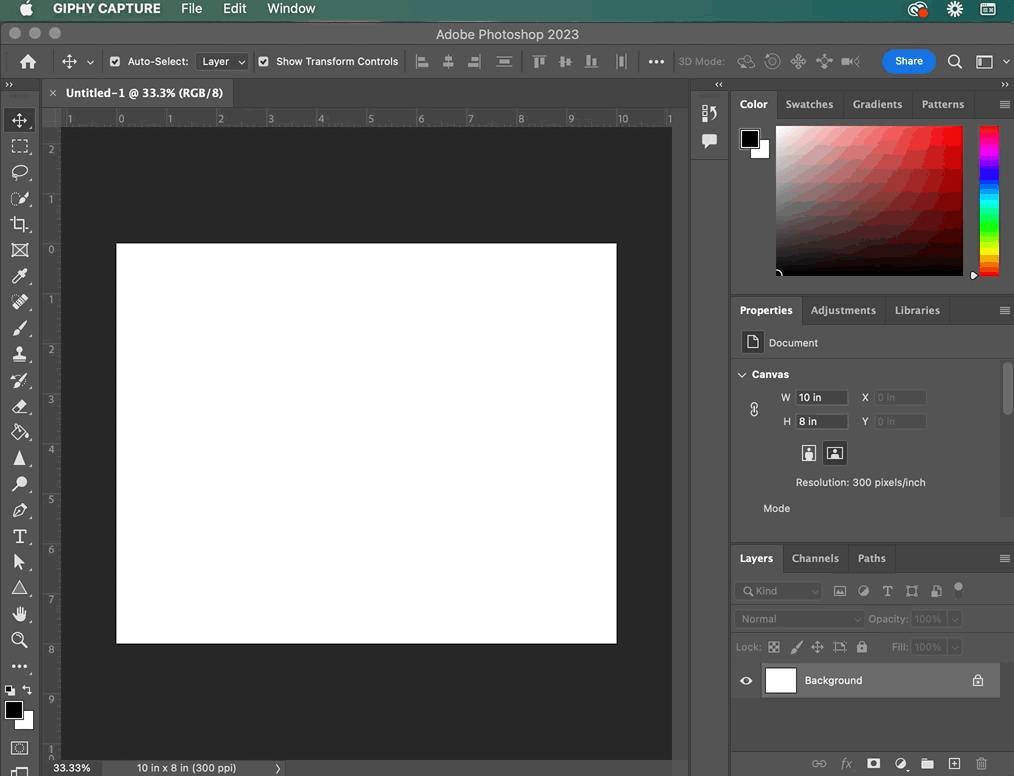 3 - Place your first image layer by going to File > Place Embedded... or by opening your Finder window and dragging your image into your workspace. 4 - Resize the placed image to fill the entire canvas. Double Click within the image to confirm transformation of your image. 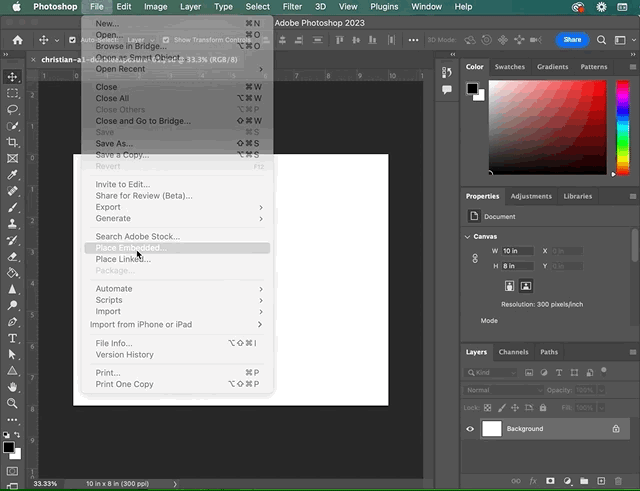 5 - Place your next image that you plan to "double expose" with the first image you placed. You can go to File > Place Embedded... again or, open your Finder window and drag the next image into the workspace. 6 - Transform your new image by enlarging it, rotating, etc. Make sure the image fills the entire canvas space. 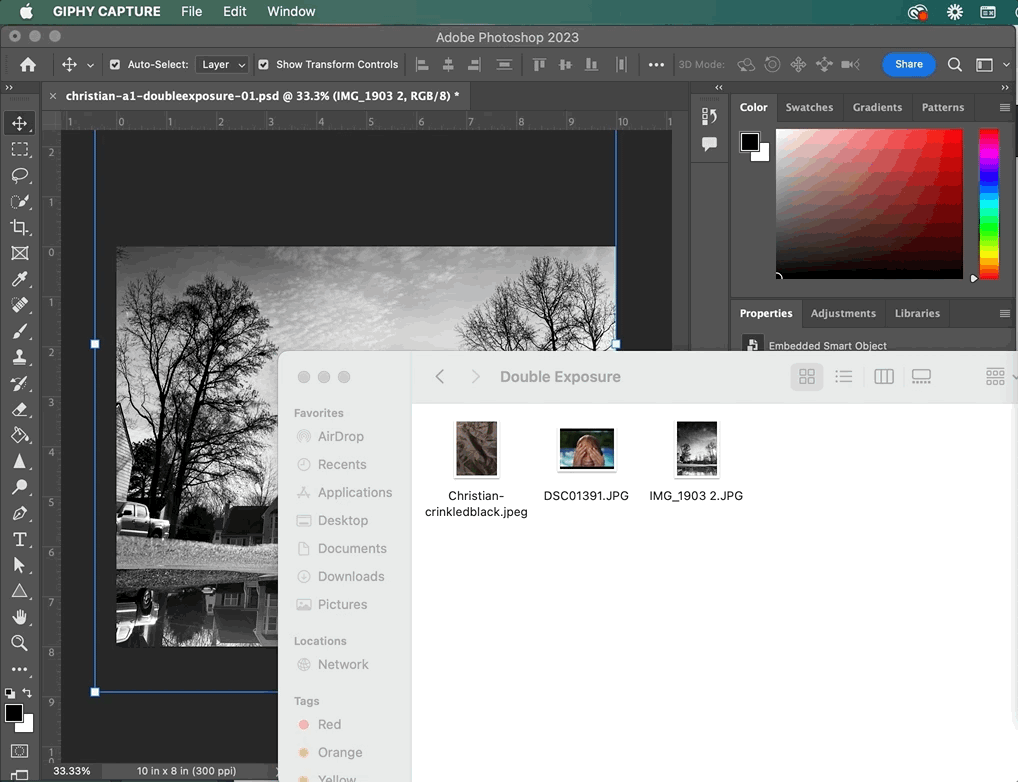
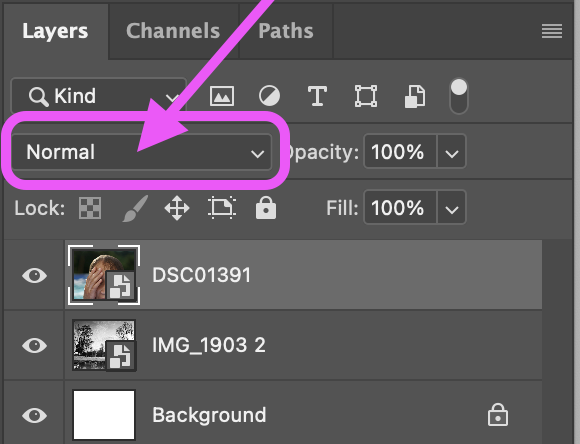
8 - Hover you mouse over EACH option in the Blending Modes drop down to see the effect. As you view each option, observe its effects. How does each one change the mood, meaning, or quality of the image? Which option aligns best with your intended outcome? Select that one. 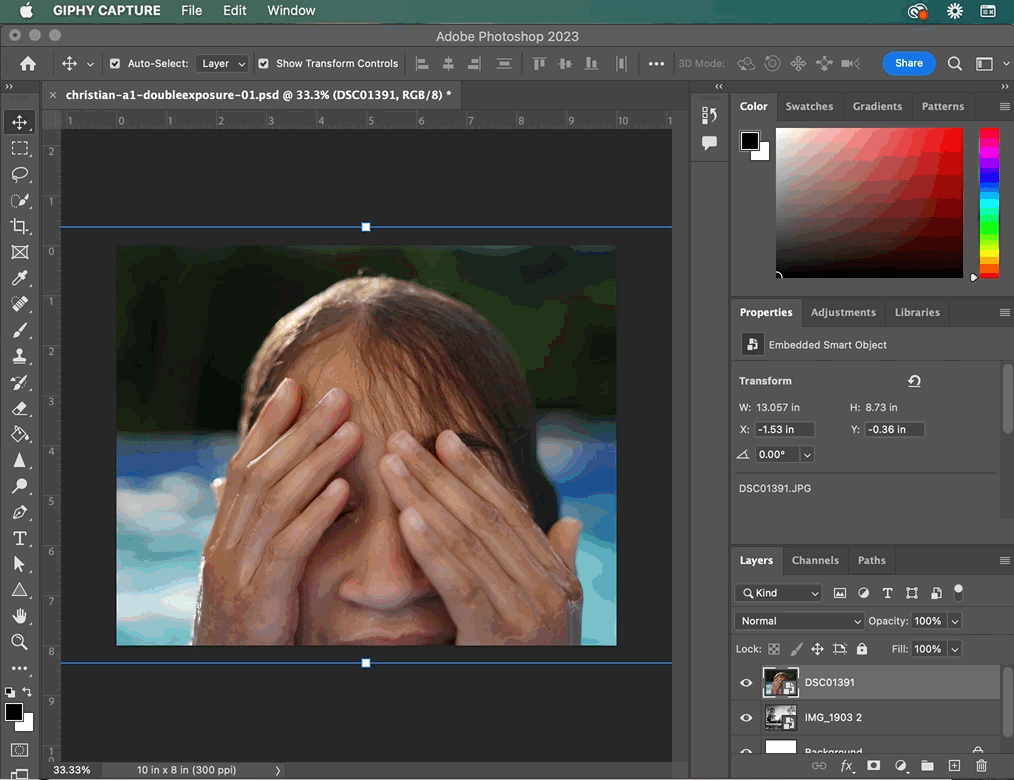 9 - Drag or place your third image. Go through the Blending Modes drop down again, you do not have to select the same blending mode for this layer. **Also, experiment with the order of the layers. In this example, I felt that the third layer made my overall image too dark, so I dragged that third layer below the second layer and liked that effect much more. 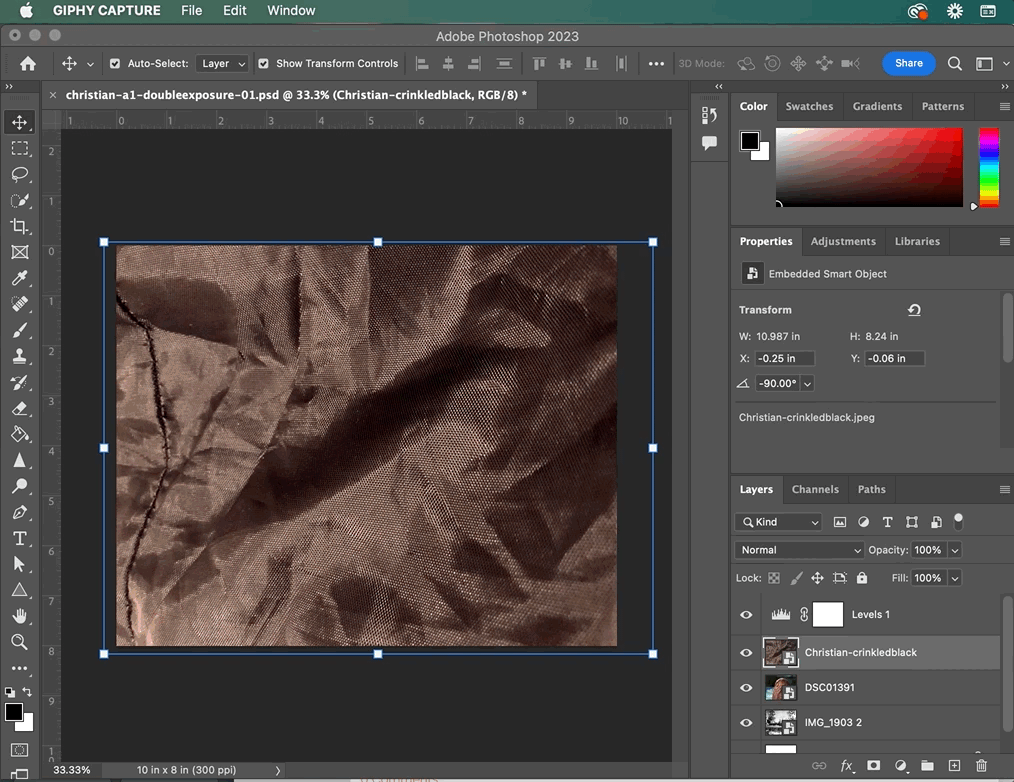 * Shift the layers around until you create a composition you really like! * What happens if you add a 4th image? Do some experimenting! 10 - Save your work! Command S. That's it! You've recreated a photography effect from the 1860s, so awesome! 11 - Save your work a .jpg by going to File > Save As...
Select JPEG from the format drop down.
0 Comments
Leave a Reply. |
 RSS Feed
